ADA Staking via Fireblocks Raw Signing
Use the official fireblocks python scripts to manage your Cardano stake
Resources:
Fireblocks ADA Staking Scripts: https://github.com/fireblocks/ada_staking
Adding stake to an existing position
In order to add stake to an existing position, simply send ADA to your wallet address and it will be added to your staked balance. Any balance added in this way will be subject to the activation period described in Step 5
Step 1 - Environment + Fireblocks API key setup
If you are already staking ADA via fireblocksYou can skip to step 4 to change your existing delegation to Pier Two
-
Create a Fireblocks API user by following this guide
- you will need a copy of your Fireblocks secret (
.key) file saved on your computer since the python script requires access to it
- you will need a copy of your Fireblocks secret (
-
Fund an ADA vault in Fireblocks with only a permanent address
- Attempting to stake from a Fireblocks vault with any address(es) other than the permanent address will result in the script exiting early with an error
- Your Cardano vault addresses list should resemble the below screenshot
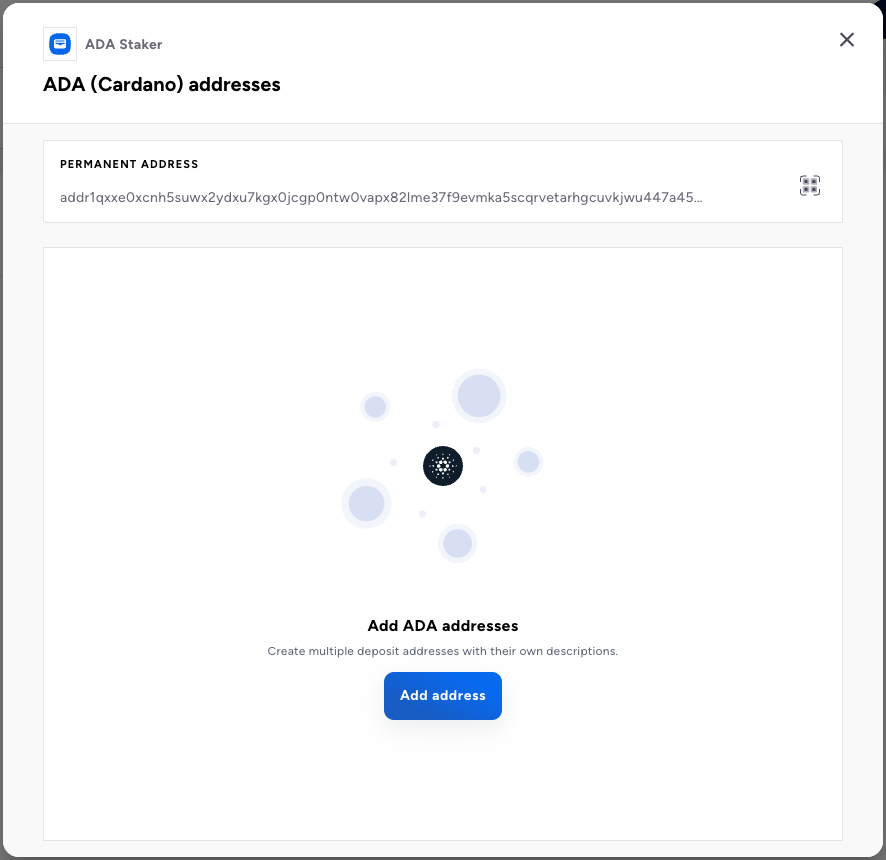
Note that there are no additional ADA addresses
-
Clone the Fireblocks ADA python staking repo
-
Update these two lines in
staking.pywith the file path to your.keyfile and your fireblocks API key (remove the<and>characters)apiSecret = open("<your_api_secret_path>", 'r').read() apiKey = "<your_api_key>"
Step 2 - Determine staking parameters + script inputs
-
Reach out to us to get a Pier Two Cardano staking pool id
-
Obtain a Blockfrost API key (you can create one free or use ours)
-
Get the ID of your funded ADA Vault, this can be found in the URL when viewing the vault in the Fireblocks UI
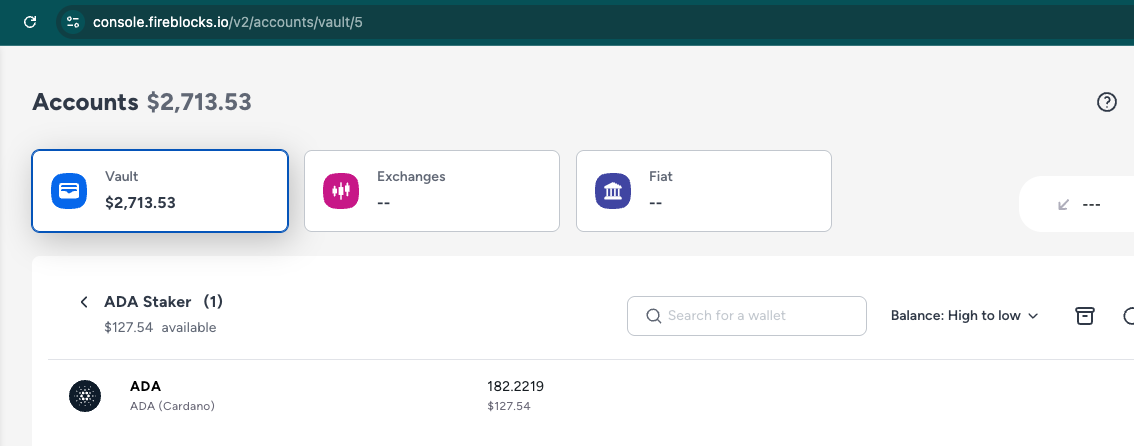
This vault has ID 5 (console.fireblocks.io/v2/accounts/vault/5)
Step 3 - Run the staking script to register your stake key
First time stakers onlyThis is only required the first time you stake with ANY Validator. If you are already staking, you can skip to step 4
- run the python script with the following command, adding in your actual values for the vault id, staking pool id and blockfrost api key. This will enable staking and enable from your Cardano address.
python3 staking.py -v <VAULT_ACCOUNT_ID> -k <BLOCKFROST_API_KEY> -n mainnet register
Step 4 - Run the staking script to delegate to Pier Two
Before you do thisThis step will fail if you have not previously registered your stake key with the Cardano network. If you are staking for the first time, please ensure you have completed step 3 before running this command.
- run the python script with the following command, adding in your actual values for the vault id, staking pool id and blockfrost api key.
python3 staking.py -v <VAULT_ACCOUNT_ID> -k <BLOCKFROST_API_KEY> -n mainnet delegate -p <PIER_TWO_POOL_ID_HASH>
Step 5 - Wait for your stake to activate and earn rewards
In Cardano, time is split up into Epochs where each Epoch is 5 days in duration. The following timeline dictates how long it will take to start earning rewards on your stake.
Assuming you registered and delegated at epoch N:
- At Epoch N + 1, your staking balance is included in a snapshot
- At Epoch N + 2, your stake activates
- At Epoch N + 3, your stake begins earning rewards
- At Epoch N + 4, your staking rewards are paid to your wallet automatically
- After this initial activation period, you will automatically receive staking rewards to your wallet every Epoch
No disruption to your rewards when changing delegationThe above timeline applies to new staking addresses. For an existing stake that is being re-delegated to Pier Two, there will be no disruption to your rewards.
You will continue to earn rewards from your old validator pool until epoch N+2, and the last payout of rewards from the old pool will occur in epoch N+3.
You will begin earning rewards from Pier Two in N+3 and will be reflected in your automatic rewards payouts from epoch N+4 onwards.
Updated 10 months ago